In summary:
- Successful crowd-free Toronto photography relies on technical strategy, not just luck or early mornings.
- Mastering urban light physics, like how skyscrapers manipulate the golden hour, is more effective than just timing.
- Advanced techniques like image stacking can digitally remove tourists from even the busiest locations.
- Choosing the right lens for perspective compression is critical for isolating subjects like the Gooderham Building.
- Understanding atmospheric conditions, especially winter clarity versus summer haze, defines the quality of skyline shots.
Every photographer visiting Toronto shares a common frustration: you frame the perfect shot of the iconic 3D Toronto sign at Nathan Phillips Square, only to have it perpetually obstructed by a wandering crowd. You envision a majestic, clean image of the Gooderham Building, but the reality is a frame cluttered with passing cars and pedestrians. The conventional wisdom offers simple, often inadequate solutions: “go at sunrise,” “visit on a weekday,” or the ever-helpful “just be patient.” While these have their place, they fail to address the fundamental challenges of a vibrant, 24/7 metropolis.
This approach treats tourist presence as an unavoidable obstacle to be dodged. But what if the key wasn’t about finding a rare empty moment, but about mastering the technical and environmental variables that render crowds irrelevant? The true professional strategy lies in understanding the unique urban geometry of Toronto. It’s about calculating how the Financial District’s glass towers create a “false sunset,” leveraging atmospheric haze (or the lack thereof) to your advantage, and using specific lenses and post-processing techniques to strategically control what appears in your final image. This is not a guide to secret, empty locations.
Instead, this is a technical manual for reclaiming Toronto’s most iconic spots. We will deconstruct the specific challenges of each landmark and provide the advanced, strategic solutions that separate an amateur snapshot from a professional cityscape photograph. By focusing on the physics of light, lens selection, and targeted techniques, you can capture the city’s essence, not its foot traffic. Forget waiting for the crowd to clear; it’s time to learn how to shoot right through it.
To navigate these advanced techniques, this guide breaks down the specific strategies for Toronto’s most sought-after photographic locations. The following sections provide a detailed roadmap for mastering each spot.
Summary: A Technical Manual for Photographing Toronto’s Icons
- Why is the “Golden Hour” Shorter in Downtown Toronto Canyons?
- How to Fly a Drone in Toronto Without Violating Transport Canada Rules?
- Polson Pier vs. Riverdale Park: Which Offers the Superior Skyline Shot?
- The Framing Mistake That Ruins Photos of the Gooderham Building
- How to Shoot the Toronto Sign at Night Without Grainy Results?
- Why is a Clear Winter Morning Better Than a Hazy Summer Afternoon?
- How to Rig Your Kayak with Lights for a Legal Night Paddle?
- The Best Skyline Views: Where to Find Free Rooftop Access in Downtown?
Why is the “Golden Hour” Shorter in Downtown Toronto Canyons?
The concept of the “golden hour” is fundamental to photography, but in downtown Toronto’s Financial District, it behaves differently. The dense cluster of skyscrapers creates what are known as urban canyons, which dramatically alter the duration and quality of natural light. The official sunrise and sunset times become almost irrelevant. Instead, a photographer must learn to read the city’s unique light map. The sun can be high in the sky, yet entire streets like Bay or York can be in deep shadow, while the glass facades of towers like Scotia Plaza and the TD Centre act as massive reflectors, creating a secondary, unpredictable golden hour.
A strategic approach is required to master this environment. It involves scouting and timing based on street direction and the sun’s angle. For instance:
- East-west streets like Richmond and Adelaide receive direct morning light, but only until around 9:30 AM before the sun is too high and blocked.
- North-south streets like Bay and York are best photographed about 20 minutes before the official sunset, not for direct light, but to capture the warm, reflected glow from the buildings.
- A “false sunset” must be calculated, often occurring 15-20 minutes *before* the time listed on weather apps, as this is when the sun dips below the skyline from your vantage point.
One of the most powerful but overlooked phenomena is the post-sunset silhouette window. Analysis using tools like The Photographer’s Ephemeris reveals that from the Ward Island Ferry Terminal, the sun sets directly behind the downtown core. This creates a brief but dramatic 30-minute window of perfect backlighting and silhouette opportunities before the majority of building lights fully activate, offering a unique and crowd-free perspective on the skyline.
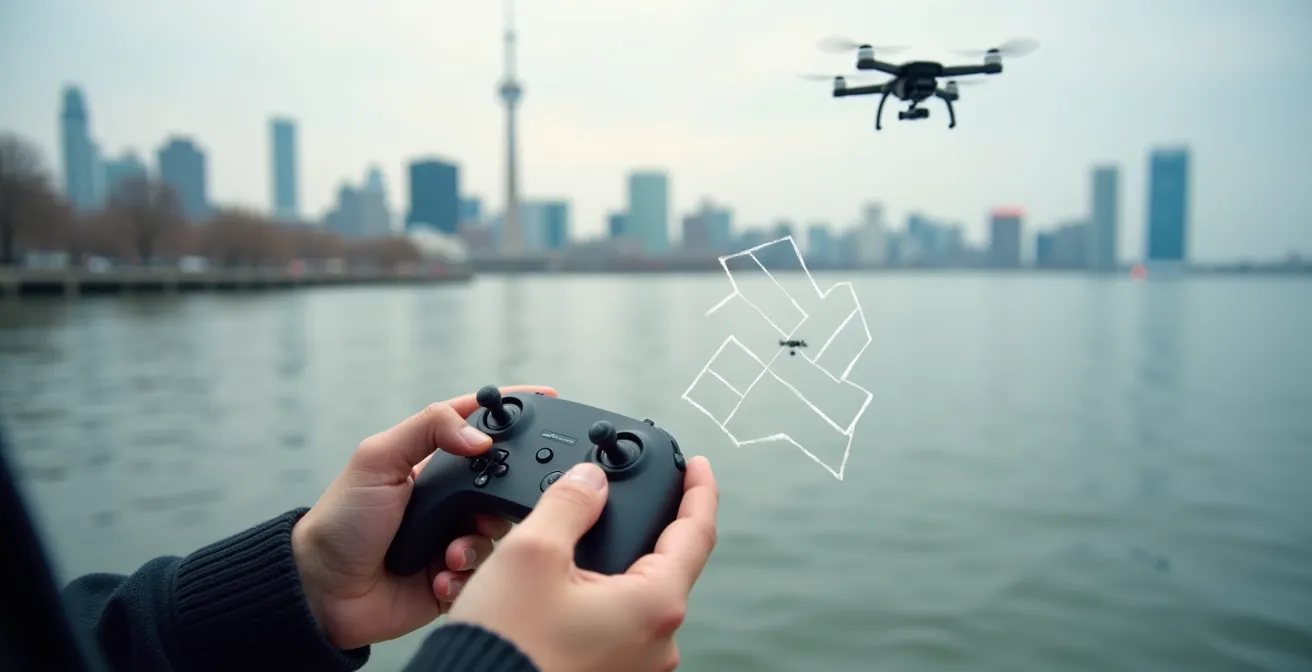
How to Fly a Drone in Toronto Without Violating Transport Canada Rules?
Capturing Toronto’s skyline with a drone offers a breathtaking perspective, but it is a technically and legally complex operation. The single most important fact to understand is that the majority of Toronto falls within controlled airspace due to the proximity of Billy Bishop Toronto City Airport, major hospitals with helipads, and flight paths for Pearson International Airport. Uncontrolled airspace is extremely limited, existing only in some parts of Scarborough. This means flying a drone downtown without proper certification and authorization is illegal and dangerous.
To operate legally, a strict protocol must be followed. Simply owning a drone is not sufficient; a pilot must become certified and adhere to both federal and municipal regulations. The crucial error many amateurs make is ignoring City of Toronto bylaws, specifically Bylaw 608-36, which prohibits the takeoff and landing of any drone in a city park without a specific permit, regardless of the drone’s size or the pilot’s certification.
Here are the non-negotiable steps for legal drone photography in Toronto:
- Obtain Advanced Certification: Any flight in controlled airspace (i.e., downtown) requires an Advanced RPAS (Remotely Piloted Aircraft Systems) Certificate from Transport Canada.
- Register Your Drone: Drones weighing 250g or more must be registered with Transport Canada, and the registration number must be clearly displayed.
- Request NAV CANADA Authorization: You must submit a flight authorization request to NAV Canada at least 24 hours before any planned flight in controlled airspace.
- Maintain Safe Distances: A minimum distance of 5.6 km from airports like Pearson and 1.9 km from hospital helipads must be maintained at all times.
- Consider Micro-Drones: While drones under 250g have fewer federal restrictions, they are still subject to all municipal bylaws, including the ban on operating in parks.
The only truly viable strategy for legal downtown shots is to operate from private property with permission or from designated zones outside the core, like Humber Bay Park West, using the skyline as a distant backdrop.
Polson Pier vs. Riverdale Park: Which Offers the Superior Skyline Shot?
The debate between Polson Pier and Riverdale Park East for the best Toronto skyline view is a classic among local photographers. However, declaring one “superior” is a technical error; they are two fundamentally different tools for two different photographic objectives. The choice depends entirely on the photographer’s intent, lens selection, and desired mood. Polson Pier is the quintessential postcard, while Riverdale Park is the layered, contextual narrative.
Polson Pier, located in the industrial Port Lands, offers a wide, unobstructed panoramic view across the water. It is the go-to for capturing the entire skyline, including the CN Tower and Rogers Centre, reflected in the harbour. It excels at sunset, when the western light illuminates the front of the buildings. In winter, it provides unique opportunities for capturing ice formations or “sea smoke” on frigid mornings. The view is architectural and pure, largely devoid of human context.
Riverdale Park East, conversely, offers a compressed, layered perspective from a high vantage point overlooking the Don Valley. This location is best at sunrise as the light hits the side of the downtown core. It requires a telephoto lens (70-200mm or longer) to compress the distance, making the skyline appear larger and more imposing behind the foreground elements of the park, running track, and Don Valley Parkway. This view is about context and community, featuring sledders in winter or social activity in summer, which can add a dynamic human element to the shot.
The following table breaks down the technical differences, based on a comparative analysis of Toronto’s primary viewpoints.
| Feature | Polson Pier | Riverdale Park |
|---|---|---|
| Best Time | Sunset/Golden Hour | Sunrise/Morning Light |
| View Type | Wide, postcard panorama with water reflections | Compressed, layered view with Don Valley foreground |
| Ideal Lens | 24-70mm (forgiving for beginners) | 70-200mm+ telephoto (for compression) |
| Winter Feature | Ice formations, ‘sea smoke’ on frigid mornings | Snow-covered hill for foreground interest |
| Human Element | Industrial, isolated (pure architecture) | Community activity (dogs, sledding) |
| Access | Industrial area, limited amenities | Broadview subway + 5 min walk |
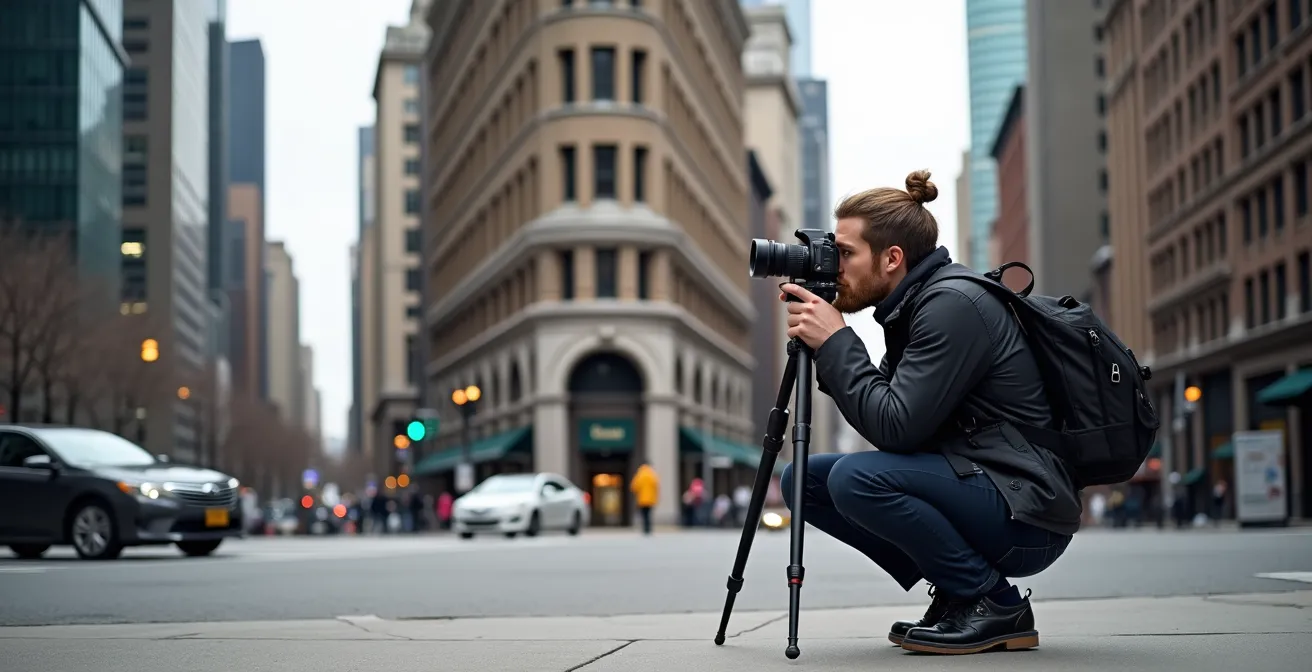
The Framing Mistake That Ruins Photos of the Gooderham Building
The Gooderham Building (or Flatiron Building) is one of Toronto’s most photographed architectural gems, but it is also the subject of a persistent compositional mistake. The intuitive move for many amateur photographers is to stand directly in front of it at the intersection of Wellington, Front, and Church streets. This proximity, especially with a wide-angle lens, creates severe perspective distortion, making the building appear to lean backwards and diminishing the grandeur of the Financial District towers behind it. The result is a snapshot, not a composed architectural photograph.
The professional technique is counter-intuitive: to properly capture the Gooderham Building, you must move further away. The key is to use perspective compression, a technique achieved with a telephoto lens. By positioning yourself further east on Front Street, near Berczy Park, and using a lens in the 85mm or longer range, you can compress the distance between the Gooderham Building and the modern skyscrapers behind it. This makes the background towers appear larger and creates a dense, textured backdrop that highlights the contrast between old and new Toronto architecture.
Executing the definitive Gooderham shot involves a series of deliberate technical steps:
- Reposition: Move east on Front Street to allow for a longer focal length.
- Use a Telephoto Lens: An 85mm, 135mm, or even 200mm lens is ideal for achieving the necessary compression.
- Incorporate Foreground: Use elements like the dog fountain in Berczy Park to create a leading line and add depth to the composition.
- Control Motion: Mount your camera on a tripod and use a 2-4 second exposure at dusk to blur the motion of passing streetcars into dynamic light trails, adding energy to the scene.
- Leverage Weather: Shoot just after a rainstorm to capture the iconic reflection of the building in the puddles on the street, a hallmark of classic Toronto photography.
This disciplined approach transforms a simple photo opportunity into a powerful architectural statement.
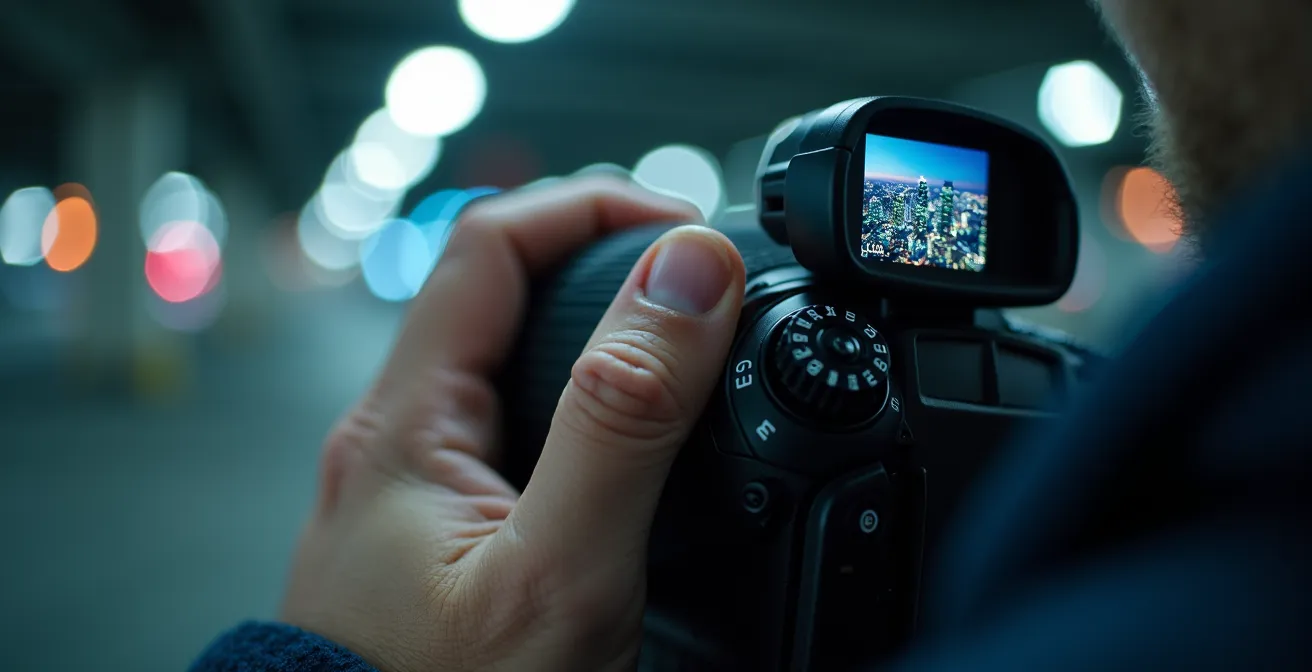
How to Shoot the Toronto Sign at Night Without Grainy Results?
Photographing the 3D Toronto sign at Nathan Phillips Square at night presents two major technical hurdles: the extreme dynamic range between the bright sign and the dark surroundings, and the constant flow of people. The common result is a photo that is either grainy from a high ISO, has blown-out highlights on the sign, or is cluttered with distracting figures. The solution lies in advanced shooting and post-processing techniques that go far beyond a single long exposure on a tripod.
The core professional strategy is image stacking. This involves capturing multiple identical frames and blending them in software. This method powerfully solves both key problems simultaneously. By using a “median” blend mode in Photoshop or similar software, the algorithm identifies and automatically removes any element that is not in the exact same position in every frame—namely, the moving tourists. This creates a clean, empty-looking square even during busy hours. Furthermore, averaging multiple frames (10-15 shots) dramatically reduces digital noise, producing a cleaner file than any single exposure could achieve.
To execute this effectively, your camera setup and settings are critical. A fast prime lens (e.g., a 35mm f/1.8) is vastly superior to a standard kit zoom lens (f/3.5-5.6). The wider aperture allows you to use a much lower ISO—for example, ISO 800 at f/1.8 will gather as much light as ISO 6400 at f/5.6, resulting in a significantly less grainy image before you even begin stacking. The winter season often provides the best conditions, as the festive lights and skating rink add reflective surfaces and atmosphere.
Action Plan: Flawless Night Shots of the Toronto Sign
- Image Stacking for Noise & Crowds: Shoot 10-15 identical, consecutive frames on a tripod. Do not move the camera.
- Tourist Removal: In post-processing, load the frames as layers and use a “median” stacking mode to automatically eliminate all moving people.
- Lens Choice: Use a fast prime lens (e.g., 35mm f/1.8 or 50mm f/1.8) to maximize light intake and allow for a lower ISO.
- ISO Discipline: Keep your ISO at a maximum of 800-1600. The stacking process will clean up the remaining noise.
- Exposure Control: Intentionally underexpose the shot by about one stop (-1 EV). This prevents the bright red of the maple leaf from “blowing out” its color channel, preserving detail that can be recovered in post.
Why is a Clear Winter Morning Better Than a Hazy Summer Afternoon?
For long-distance skyline photography in Toronto, a crisp, clear winter morning consistently yields superior results to a seemingly pleasant summer afternoon. The reason is a matter of atmospheric physics, specifically the presence of humidity and pollutants that create atmospheric haze. While many assume winter air is more humid, the critical factor is not relative humidity but the absolute moisture content and clarity of the air mass.
Summer in Toronto, with average July temperatures around 27°C, is characterized by warm, humid air masses moving up from the south. This air is laden with moisture from Lake Ontario, as well as pollutants and particulates. These microscopic particles scatter light, which reduces contrast, softens fine details, and casts a blue or white haze over distant objects like the skyline. Even on a “clear” summer day, this haze is present and will degrade the technical quality of a telephoto shot of the skyline from locations like Scarborough Bluffs or Leslie Street Spit.
In contrast, Toronto’s coldest winter days are often dominated by dry, dense arctic air masses flowing down from the north. While it’s a surprising fact that Toronto’s winter months can have higher relative humidity than summer months, the cold air simply cannot hold as much absolute moisture as warm air. This arctic air is exceptionally clean and free of the particulates and moisture that cause summer haze. The result is an incredibly transparent atmosphere that allows for maximum light transmission. This leads to sharper details, higher contrast, and richer colours in the skyline, making winter the prime season for professional-grade cityscape telephotography. The low angle of the winter sun also creates more dramatic shadows and modelling on the buildings.
How to Rig Your Kayak with Lights for a Legal Night Paddle?
A night paddle on Lake Ontario offers one of the most unique and breathtaking photographic opportunities in Toronto: capturing the illuminated skyline from the water, potentially with the added creative element of light trails from your own vessel. However, this is an advanced undertaking that carries significant legal and safety responsibilities. Operating any watercraft at night requires specific lighting to be visible to other vessels, as mandated by Transport Canada.
The legal minimum for a kayak or canoe is a 360-degree white navigation light that is visible from all directions. This can be a battery-operated, pole-mounted marine light that ensures you meet the basic anti-collision requirements outlined in Transport Canada’s safe boating guide. Failure to display this light can result in fines and creates a serious risk of collision with larger, faster vessels, especially the Toronto Island ferries whose routes you may be crossing.
Beyond the legal minimum, you can add creative lighting for photographic purposes. A popular technique involves rigging waterproof LED strips along the sides of the kayak, powered by a portable USB battery pack stored in a dry bag. For the best photographic effect without blinding other boaters (or yourself), these strips should be positioned just below the waterline. This creates a dramatic underglow effect that will paint the water with light during a long exposure, but remains indirect and non-distracting to others. The entire setup must be meticulously planned:
- Legal Lighting: Mount a 360-degree white navigation light on a tall pole at the stern for maximum visibility.
- Creative Lighting: Secure waterproof LED strips (e.g., RGB strips for colour choice) below the gunwales of the kayak.
- Power Source: Use a high-capacity USB power bank in a secure, waterproof dry bag.
- Safety Checks: Check the marine forecast and avoid nights with winds over 20 km/h. Study the ferry schedules and routes to stay clear of their paths.
- Coordination: This shot often requires two people: one paddling the kayak and one on shore (e.g., at Trillium Park or Polson Pier) operating the camera with a 15-30 second exposure to capture the light trails.
This transforms a simple paddle into a coordinated, legal, and highly creative photographic project, as demonstrated by stunning winter shots taken from Harbourfront.
Key takeaways
- Mastering urban light physics, including reflected light and “false sunsets,” is more crucial than just timing.
- Perspective compression with telephoto lenses is a non-negotiable technique for isolating architectural subjects.
- Advanced post-processing like image stacking is a primary tool for eliminating crowds and digital noise in night shots.
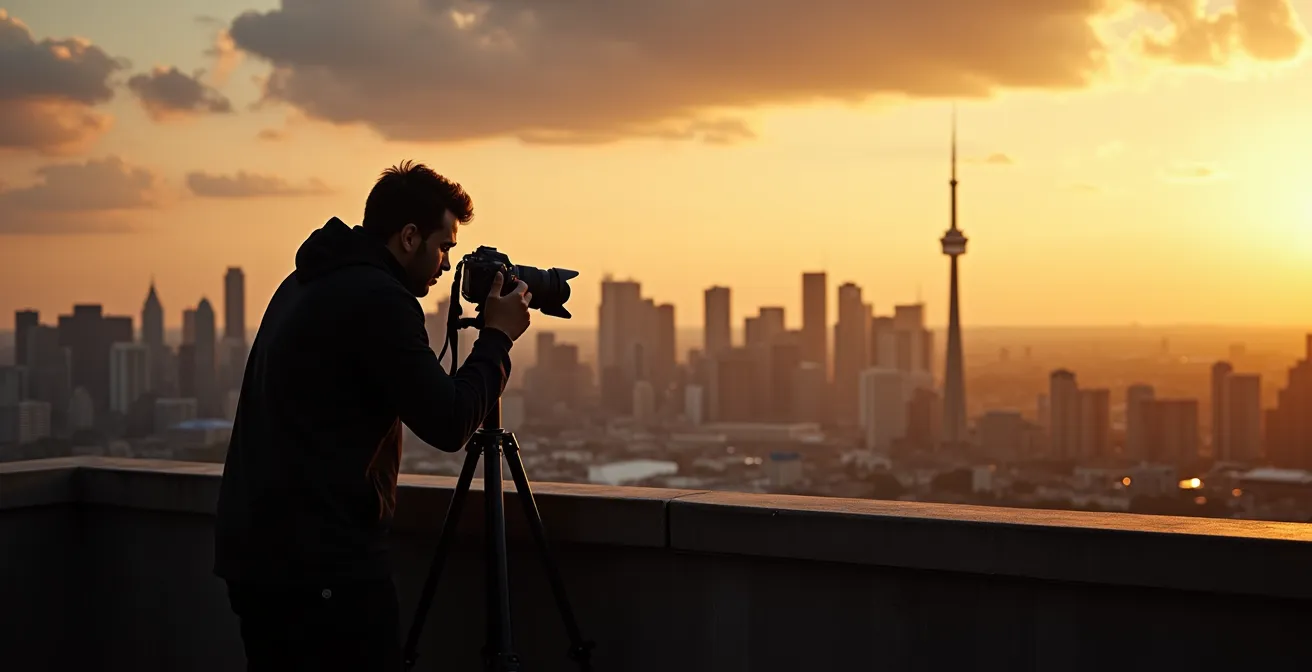
The Best Skyline Views: Where to Find Free Rooftop Access in Downtown?
The pursuit of an elevated, rooftop view of the Toronto skyline is a common goal for photographers, but the idea of “free rooftop access” is largely a myth and often leads to unsafe or illegal activities like trespassing. Truly accessible, high-level, open-air rooftops are almost exclusively the domain of private residences, hotels, or restaurants. A professional photographer’s strategy is not to seek out illicit access, but to leverage legal, publicly accessible elevated positions that mimic a rooftop perspective.
The most reliable and effective options are often overlooked: multi-level parking garages. These structures offer height, a stable platform for a tripod, and different angles on the city. For a fee, the upper levels of garages like the Manulife Centre or the Green P at 9 Church Street (excellent for the Gooderham Building) provide outstanding, unobstructed views. Another excellent strategy is to use pedestrian bridges, such as the one crossing the Don Valley Parkway just south of the Bloor Viaduct, which perfectly frames the skyline with the dramatic foreground of highway light trails.
While not “free,” purchasing a single drink at a rooftop bar like the ones at the Thompson Hotel or Lavelle provides guaranteed, legal access to some of the most premium views in the city for the duration of your stay. Other creative, ground-level options can provide elevation, such as the public upper floors of the Toronto Metropolitan University’s Student Learning Centre or the well-known Chester Hill Lookout. However, it is important to note that even public spots like Chester Hill can have safety concerns; residents have reported issues with late-night crowds and vandalism, making early morning visits the most strategic choice for both safety and optimal light.
Here is a list of legal and reliable elevated viewpoints:
- Green P Parking Garage (9 Church Street): Offers a direct, elevated view of the Gooderham Building and Financial District.
- Chester Hill Lookout: A classic viewpoint offering a dramatic look at the DVP sweeping towards the skyline. Best at dawn.
- Bloor Viaduct Pedestrian Bridge: Provides a compressed view of the skyline framed by the bridge’s architecture.
- Toronto Metropolitan University (TMU) Student Learning Centre: The upper, publicly accessible floors offer unique geometric window frames for your city shots.
Ultimately, the professional approach prioritizes safety, legality, and quality over the romanticized notion of a “secret” free rooftop.
The next step is to take these technical frameworks, move beyond simply documenting landmarks, and start creating your own definitive, crowd-free images of Toronto. Mastering these strategies is what will set your work apart.